Stampin’ Up! Weekly Deals & More
Jelly Roll Race Quilt Along
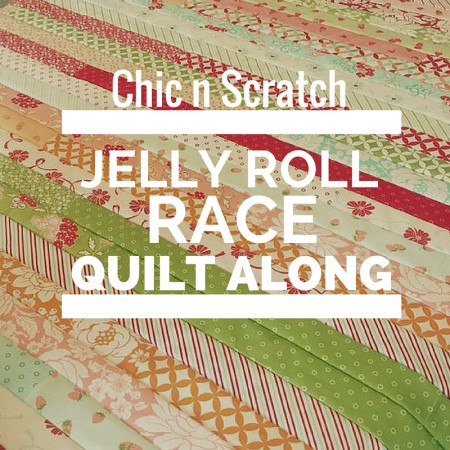
My next Quilt Along Series is the Jelly Roll Race Quilt.

I’ve made about 20 of these quilts and they are so very easy to make … and addictive as well.
What is a Quilt Along? Step by step instructions in a video format on how to make a Jelly Roll Race Quilt Top. Once the quilt top is complete we’ll take it to a longarm quilter to finish. These Quilt Alongs are designed for beginning quilters!!
Ambleside by Moda Fabric
- One Jelly Roll (40 strips that measure 2-1/2 x 44)
- 4-1/2 Yards of Backing Fabric
- 1/2 Yard of Binding Fabric

Jelly Roll Race Quilt Along Video 1
- Unroll Jelly Roll and keep the strips in the order they arrived.
- Trim salvage on the end of each strip.
- Cut 18 inches off the very last strip.
Video #2
- Pick up the end of the first strip and the beginning of the 2nd strip, place them right sides together and sew a 1/4 seam down the right side.
- When you reach the end … lift foot on sewing machine and pull back just a tad, giving you room to sew the next one.
- Pick up the end of the 2nd strip and the beginning of the 3rd strip, place right sides together and sew 1/4 seam down the right side (left foot and pull the strips back giving you room to sew the next one).
- Pick up the end of the 3rd strip and the beginning of the 4th strip, place right sides together and sew 1/4 seam down the right side (left foot and pull the strips back giving you room to sew the next one).
- Repeat this to the very end.
- When you reach the end you will need to snip the threads where you sewed then together.
- Find both ends of your long strip (1600″).
- Take the beginning of the first strip and the end of the last strip, place them right sides together and sew 1/4 seam down the right side.
- Stop often and make sure your fabric is straight.
- This step will take a while.
Video #3
- Pick up where we left off in video 2 and sew to the end.
- When you reach the end use scissors to cut across.
- Take both ends and place them right sides facing together and sew down the right side with a 1/4 inch seam (all the way to the end). Keep seams flat if you can.
- Repeat Step 2 and 3 for a total of five times.
Video #4
- Now that our quilt top is complete we need to check it for holes and trim all the threads.
- Measure for backing and binding fabric using the Robert Kaufmann Quilting Calculator (app on iPhone).
- Press your Quilt and use Starch.
- Take the Quilt Top, Backing Fabric, Binding Fabric to a long arm quilter to complete.
- Optional: If you want a label on the back of your quilt, also take it to the long arm quilter.
Here’s a picture of the quilt … please ignore the wrinkles! I did not have time to iron this round of quilts … next time I will be sure to take pictures before I wash them.

Thank You Bundles
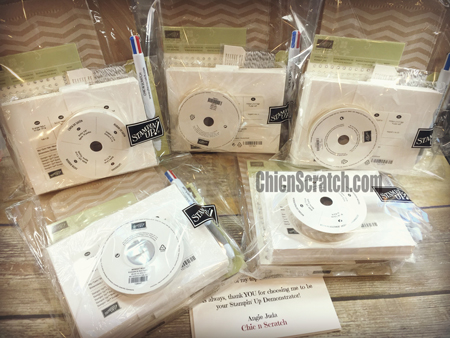
My top ten customers of 2015 were mailed these Thank You Bundles this week. Thank you again for choosing me to be your demonstrator!! We sent 11 bundles instead of 10 because they were so close in sales. We hope you enjoy the product!
Thanks and have a great day!
Hi Angie,
Looking forward to the quilt along.
Have a great evening.
Congrats Nancy!!! I love your site and everything you make!!!
Looking forward to the quilting tutorial. You make everything so exciting. Have a great week.
looking forward to seeing your completed quilt!
Thanks for all you do to encourage us.
Hi Angie,
I had never heard of a jelly roll before. The ones you have made are very nice. Looking forward to learning how to do it. Also, Happy Christmas to you & Dave
(plus Brooke, Chase, Miss Bella and Skittles)
Angie.. I have followed you for a few years and as always you have amazing ideas and projects. Have a Merry Christmas and Happy New Year to you and your family.
Angie, you are so incredibly kind and generous to all of your customers and blog followers. Thank you for the many wonderful opportunities that you bestow upon us! I hope you and Laura, and both of your families, have an absolutely amazing holiday season! Merry Christmas and Happy New Year!
Enjoying all the creative projects your making for the 12 days of Christmas. Thanks for the chance to win a big shot. Crossing my fingers. Happy Holidays!
Thank you for a chance to win a Big Shot. Merry Christmas to you and your family!
Love today’s gift bag! Thanks, Angie!
Happy Holidays!! enjoy the season of giving. Love all your ideas and creativity.
xoxo
Thank you for the chance to win a big shot. I have followed your blog for years love your ideas and creativity. Can’t wait to see what you come up with next.
Love you website, you ate talented lady
Angie, I really like your videos and all of your great ideas! You are so talented!
Enjoy following your blog – love the inspration!
Love your videos! Learning lots of fun stuff!
Hi! My daughters and I just found you and have been watching your videos a lot! Now we want to make your creations! Thank you!
You are so creative I love all your tutorials
Love all your projects!
I love your videos. Can’t wait to see what you do next year.
Merry Christmas! You are amazing. Stamping up is lucky to have you on their team.
Amazing tutorials, thanks for sharing!
I always look forward to what you will share next. I have even tried to make several of the boxes. And now prizes too. WOW!
Love your promotions! Thanks!
Always glad to hear from you! Merry Christmas! Be well!
As usual, a lot of information. You are so involved!
I love all of your Creative ides. We are all so Blessed to have you as a someone that we can turn to with any questions that we might have. I wish that you lived closer to where that I live so that I could attend to some of your classes or be my demonstrator Thank you for all you do.
I just love your videos and all your ideas. I need to get in my craft room and order some new stamp pads. 😉
Happy New Year!!!
Happy New Year & a healthy one too. another year to exciting new demos!